Customize the dialogue flow
Your agent uses a dialogue flow to handle different phases of a conversation. Think of it as a roadmap that guides your agent through various scenarios—from greeting customers to answering questions to ending the call.
Understanding dialogue states
A state represents a specific phase or context in a conversation. Each state has its own instructions that tell your agent how to behave in that particular moment.
Your newly created agent came with a template dialogue flow that includes these states:
- Greeting and determine topic - Welcome the customer and identify what they need help with
- General question - Answer general questions without needing customer information
- Verify customer identity - Authenticate the customer before accessing personal information
- Transfer to representative - Connect the customer with a human agent when needed
- End conversation - Close the conversation professionally
This template provides a solid foundation for most customer service scenarios. Let's customize it for your use case.
Accessing the dialogue builder
- In Studio navigate to the editor for your agent and click the Dialogue Builder tab at the top
- You'll see a visual diagram showing your dialogue flow with connected states
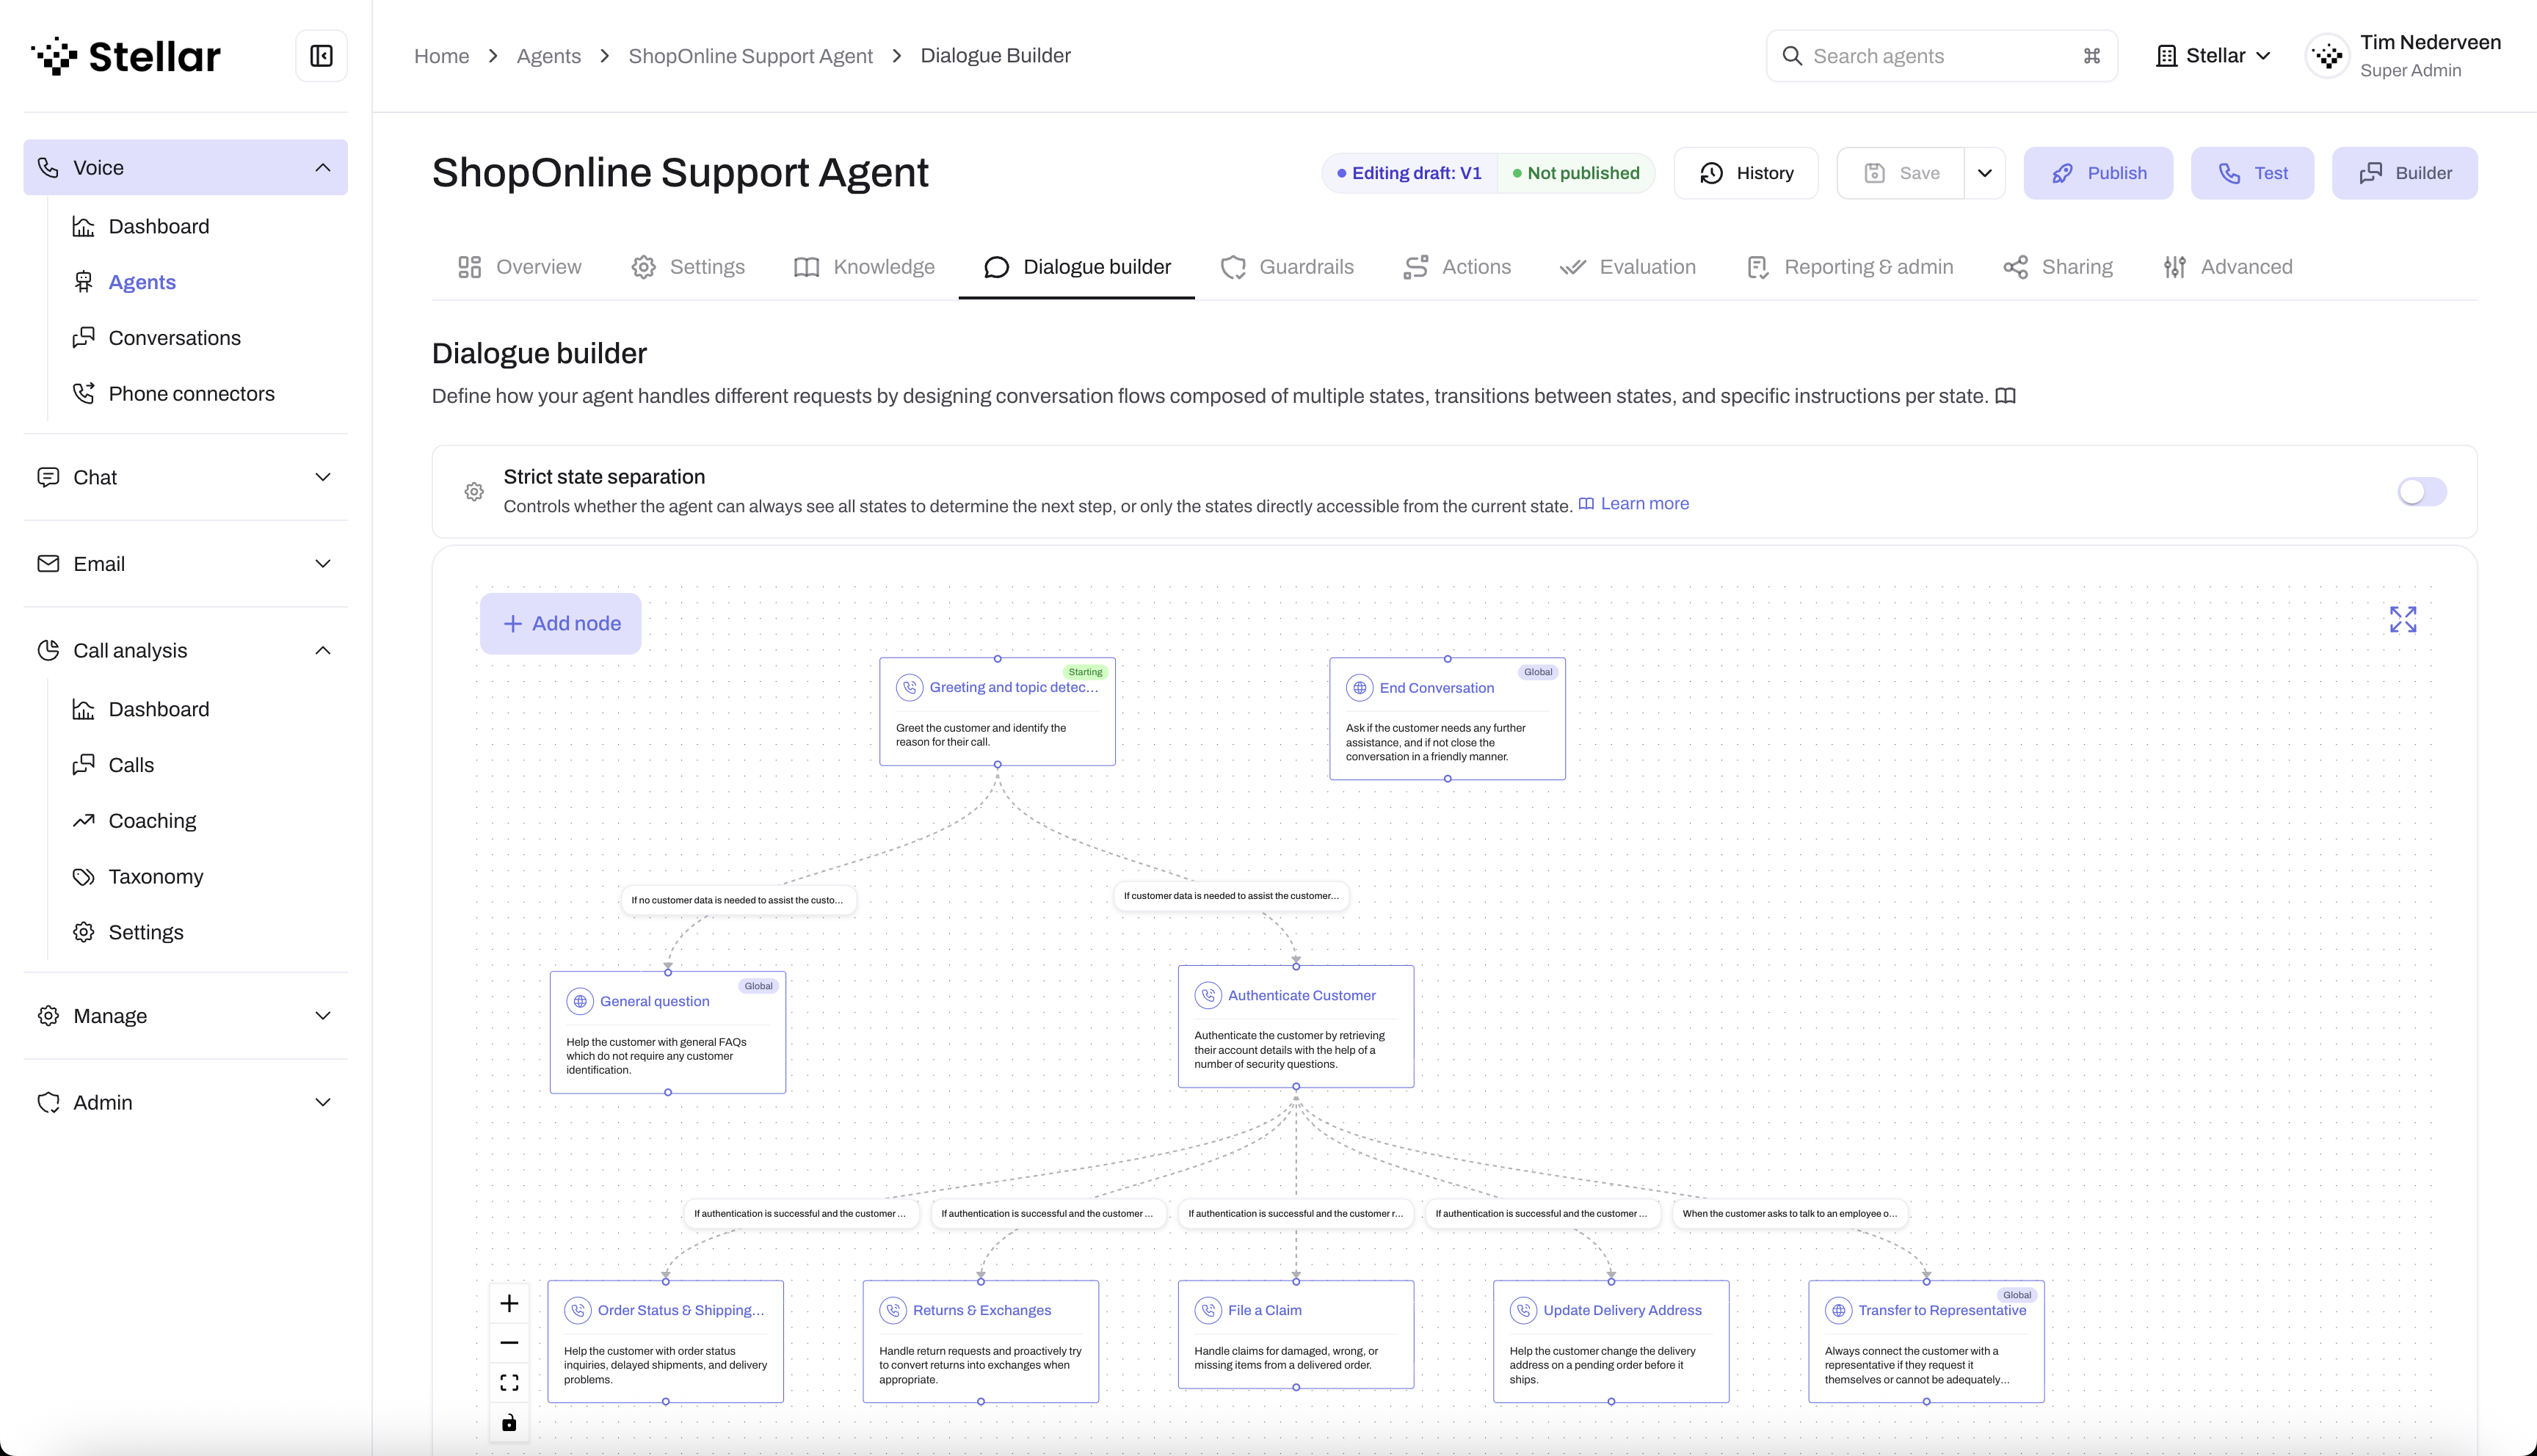
The visual diagram shows how states connect to each other through transitions (the arrows between states). This gives you an overview of all possible conversation paths.
Customizing your first state
Let's customize the greeting state to match your organization:
- Click on the "Greeting and determine topic" state in the diagram
- An editor will open showing the state's configuration
Name and description
- Name: Keep this short but descriptive (like "Greeting and determine topic")
- Description: Use this to briefly describe what happens in this state
Instructions
The instructions field is where you tell your agent exactly what to do in this state.
Here's an example for an English customer support agent:
- Start the conversation by saying: "Hi! You're speaking with [YOUR AGENT NAME], the virtual assistant for [YOUR COMPANY NAME]. Our team is currently busy with other customers, but I'd be happy to help you while you wait. What can I help you with today?"
- Listen carefully to understand what the customer needs
- If the topic isn't clear, ask follow-up questions to clarify
- Make sure you fully understand their request before moving to the next step
- Use bullet points for better readability
- Be specific about what the agent should say and do
- Include exact phrases with quotation marks ("") for important moments (like the greeting)
- Make sure the instructions are clear and don't contradict
- For model-specific techniques, see OpenAI's realtime models prompting guide. Note that GPT Realtime 2 and GPT Realtime 1.5 use significantly different prompting styles, so follow the section matching your agent's model.
Save your changes
Click Save in the state editor when you're done editing.
Understanding transitions
Transitions define when your agent should move from one state to another. They're the arrows you see connecting states in the visual diagram.
For example, the greeting state has two transitions:
- To "General question" - When the customer has a question that doesn't require authentication
- To "Verify customer identity" - When you need to verify the customer before helping them
Each transition has a condition that describes when to use it. The agent uses these conditions to decide which state to move to next.
Your agent automatically chooses the right next state based on the conversation context and transition conditions. You don't need to manually trigger transitions. The agent handles this intelligently if your transition instruction is well-defined.
Globally accessible states
States can be marked as globally accessible. This means the agent can jump to these states from anywhere in the conversation. Examples in your template are:
- Transfer to representative - Customers can request a human agent at any time
- End conversation - The agent can close the call from any state
This flexibility ensures your agent can handle unexpected situations gracefully.
Customizing other states
You can customize any state in your dialogue flow:
- Click on the state in the visual diagram
- Update the instructions to match your use case
- Modify the transitions if needed
- Save your changes
Start by customizing the states you know you'll need. You can always refine others later based on real conversations and your use cases.
Tips for effective dialogue flows
Start simple
Focus on optimizing the greeting and a single use case first. You can add complexity later.
Use clear language
Write instructions as if you're training a human agent:
- "When the customer asks about pricing, explain our three plan options..."
- "If the customer sounds frustrated, acknowledge their concern and offer to escalate..."
Test as you go
After customizing a state or two, test your agent to see how it performs. This helps you catch issues early and iterate quickly.
What's next?
Now that you've customized your dialogue flow, you're ready to test your agent and see how it handles real conversations!